
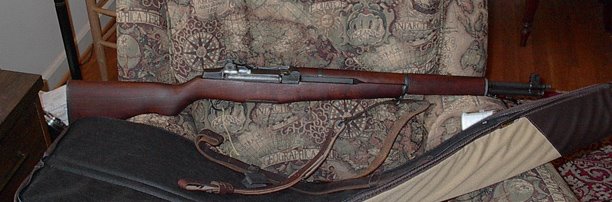
You can see the after market muzzle break on the tip there. With it on, no bayonetting of the wounded for me. A bayonet won't fit, now.

I wanted to replace the rear handgaurd with a scout scope mounting from Fulton Armory. While doing this, I noticed I was missing the ping that secures the lower band retaining pin, so now that is on order. The lower band ferrule wants to stay attached to the walnut rear hand guard, so I am getting another ferrule too. This missing pin and spare ferrule prevents me from fully reassembling the rifle. Ah well. Soon, soon. But jeez, now I have a box of parts sitting around.
The other thing I wanted to do was replace the plastic spacer block in the magazine well with a metal one. You can see the ivory colored spacer (circled) in the picture below sitting atop its gray metal replacement, already in place. You can see the Scout Scope mount, too. The purpose of this spacer block is to prevent you from trying to load the longer original .30-06 cartridges in a rifle converted to 7.62/.308. The plastic seemed flimsy and bugged me from day one. Well now it is gone. I was very worried when I tapped out the pin that holds this altogether at the front part of the receiver, as doing so caused 4 different things to just fall right out of the gun. The book I bought on Garand assembly was invaluable for getting it all back right.
I wanted to disassemble, inspect, clean and reassemble the bolt. I have spares for this already, as I mentioned yesterday. And the bolt tool for easy disassembly. I thought there might be schmutz inside the bolt, and that might have caused a slam fire I experienced. Here is the before:

And the after:

Notice the gunk on the paper towels? Yup, probably a good idea to clean it out. I also could see all those tiny parts and springs, and see they were still in pretty good shape. I need to NOT slop a lot of oil and cleaner near the bolt face in the future to keep it from building up all that gunk. It went back together just fine. And I can use the bolt tool on any M1A purchase I might make.
So when the new ferrule arrives, this week probably, I will reassemble, test for function, HOPEFULLY not have to take it to a real gunsmith to correct what I messed up, and be all ready to get a scope in a month or two.
When I reassemble later this week, I am going to re-grease the exposed parts that require it, too.

1 comment:
I've got one of those muzzle brakes...it came with the rifle. It just replaces the gas cylinder lock; it looks pretty much identical to the one you've got on there. I like keeping mine original so I've never even put it on.
You're going to have to be careful though...gunsmithing can be addictive.
It always starts out small. A little adjusting here, replacing a minor part there...pretty soon you'll have a hacksaw and the cold blue out thinking "what if I take a couple of inches off right about...here?"
Post a Comment